
Hello there, it is Verity here from Pretty Little Button for the Bumbleberry Design team. With a bit more time on your hands, now might be the time to get our your watercolour paints and practice. That's what I decided to do with the Altenew Paint-a-flower Poppy stamp set, and I loved how well it came out that I used it in today's card. I paired the soft colouring with a bold colour on the background and added some soft texture to elevate the image.
Written and photos Watercoloured Poppy with textured background:
To start off, stamp the Altenew Paint-a-flower Poppy onto watercolour cardstock I a soft waterproof ink such as Gina K Amalgam whisper ink. Next, use your Altenew 36 Watercolor Pan set to colour the flower in.
Remember with watercolours it is all about taking your time to build up the colours. Start off by giving one petal a soft wash of colour. Whilst letting that petal dry, work on another petal but make sure this does not touch the petal you have just painted. Once the first layer of paint is dry, you can go back in to add more colour to areas of the petal where there are shadows to add dimension. For the petals, I used the colours Crimson and Rubeltie.
Use the same process to paint the leaves and stem in. Here I used Bamboo, Forest Glades and Evergreen for the colours.
Whilst you allow the painting to dry, you can work on the background. Place the Altenew Chevron stencil down over a piece of Hero Arts Hero Hues Nautical Cardstock. With a spatula, add decoFoil Therm O Web Champagne Mist over the stencil in a haphazard way. Set this panel to one side to dry.
Once the background panel has dried, foam mount this onto a 5"x&" white card base. Next, fussy cut the Poppy out and foam mount onto the front.
Next, heat embosses one of the sentiments from the stamp set in white onto black card, trimming this down to add to the front of the card. Lastly, add a few Gold Nuvo Drops to finish the card off.
If you enjoyed today's card, please let us know and we would love to see your cards if this has inspired you.
Shopping list for TITLE:
Links to supplies at Bumbleberry Papercrafts Shop:

Gina K Designs - Connect Glue
Shop at:
BP
|
Neenah Classic Crest Solar White 110lb Cardstock
Shop at:
BP
|
Scrapbook Adhesives 3D foam squares 1/4" white
Shop at:
BP
|
Original MISTI - My Sweet Petunia
Shop at:
BP
|
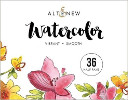
Watercolour 36 Pan Set - Altenew
Shop at:
BP
|

Whisper Amalgam Ink - Gina K Designs
Shop at:
BP
|
Teflon Bone Folder - Lawn Fawn
Shop at:
BP
|

Broken Chevron Stencil - Altenew
Shop at:
BP
|

Paint-a-Flower Poppy - Altenew
Shop at:
BP
|

Nautical Hero Hues Cardstock - Hero Arts
Shop at:
BP
|
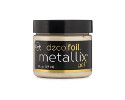
Champagne Mist Metallix Gel - decofoil Therm O Web
Shop at:
BP
|
If you enjoyed this post and create a card like this, make sure you share it in the Bumbleberry Craft Room on Facebook for us to check it out!
Until next time!
Verity

Pretty Little Button Blog | Instagram | Facebook | Youtube


Absolutely beautiful. Just so different from anything I’ve seen. Thank you for your inspiration.