
Hello there, it is Verity here from Pretty Little Button for the Bumbleberry Design team. This technique speeds up making cards as you can make two cards in one go. Spotlight stamping with coloured inks and die-cutting can create fun and interesting designs adding a focal point fo draw the viewers eye into the card and to the sentiment. For these cards, we're going to use a layering stamp, but if you prefer you can keep it simple with a one layer stamp if you prefer. So let's get started.
Written and photos Spotlight stamping with coloured inks and die-cutting:
Trim two pieces of Neenah Classic Crest Solar White 80lb cardstock to 5.25" x 4". Place one of the card panels into your MISTI stamping platform. Take the first layer of the largest floral from the Altenew Watercolor Blooms stamp set and position off to one corner. To help determine the layout, place an Altenew Nesting Frame Die over the card panel to help position your stamp. Stamp this in a soft blue ink, and rotate the card panel to stamp in the opposite corner.

Before removing this stamp from your MISTI, position the second card panel in the MISTI and repeating the stamping in both corners but this time in soft grey ink. Once this layer is complete, position the second layer over the top and stamp in dark grey ink and then repeat in a dark blue ink for the coloured panel, remembering to rotate your panel to stamp in both corners.

Before you go on to stamp another flower, stamp the first layer of the first flower onto some Inkadinkadoo Stamping mask paper twice and cut out. Position these over the stamp images and proceed to stamp the second floral in both corners on the coloured and grey panel. Repeat this for the third floral.

Before you stamp the foliage, create masks for the other two florals to protect these when stamping. Stamp the foliage in a combination of soft greens for add variation.

To create the matching die-cut aligned panels, use a small amount of purple tape to tape the two panels together at the top. Next, use purple tape to temporarily adhere to one of the Altenew Nesting Frames dies to the front and run through your die-cutting machine.

Depending on your die-cutting machine, this hopefully will have cut through both panels. If it hasn't it will have marked the second panel allowing you to realign the die on your second panel to complete the cut.

Adhere the stamped panels down to a white card base and a mint green card base - swapping the die-cut panels with one another. To add more interest, add foam dimension to create variation.

For the sentiments, die-cut the Altenew Fancy Thanks and Miss You Word die out of green and rose cardstock before adhering the to the front of the panels with foam pads for added dimension. In addition, also stamp and heat emboss secondary sentiments from the ALtenew Hello & Hugs stamp set.

To finish the cards off, a selection of Nuvo Jewel Drops were added around the card design.

Shopping list for Spotlight stamping with coloured inks and die cutting:
Links to supplies at Bumbleberry Papercrafts Shop:
 Gina K Designs - Connect Glue Shop at: BP |
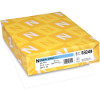 Neenah Classic Crest Solar White 110lb Cardstock Shop at: BP |
 Neenah Classic Crest Solar White 80lb Cardstock Shop at: BP |
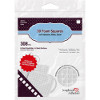 Scrapbook Adhesives 3D foam squares 1/4" white Shop at: BP |
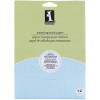 Inkadinkdoo Stamping Mask Paper Shop at: BP |
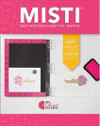 Original MISTI - My Sweet Petunia Shop at: BP |
 Teflon Bone Folder - Lawn Fawn Shop at: BP |
 Fancy Thanks - Altenew Shop at: BP |
 Bold bunch stamp - Altenew Shop at: BP |
 Bold Bunch Die - Altenew Shop at: BP |
 Hello and Hugs - Altenew Shop at: BP |
 Miss You Word Die - Altenew Shop at: BP |
 Purple Tape - 0.5" - Thermoweb Shop at: ALT |
Watercolored Blooms Die - Altenew Shop at: BP |
If you enjoyed this post and create a card like this, make sure you share it in the Bumbleberry Craft Room on Facebook for us to check it out!
Until next time!
Verity

