
Hello there, it is Verity here from Pretty Little Button for the Bumbleberry Design team. Today, I'm getting creative with the Spellbinders Stitched Ornament today making two fun and different style of Christmas cards. This is such a great way to switch things up and show you how to get two looks with one die set. So let's get started!
Written tutorial and photos for Two looks with one die:
Start by die-cutting the outline ornament die from the Stitched Ornament die out of Brushed Rose Metallic Cardstock. In addition, die-cut the filigree dies that come with the set out of white card and adhere this onto the ornament, cutting off the excess overhang.

Cut the topper and delicate ornament detail out of grey card, layering this up to create dimension. Foam mount this onto a white card panel which has been embossed with the Tiled Chevron 3D embossing folder and add this to a white card base.

To embellish the ornament, add a black bow out of black cord and add some black sequins to the background surrounding the ornament. Lastly, add some small Ivory Opal Gems onto the grey decoration on the ornament. Finally, add a foiled sentiment to the front.

For this card, we're switching the colour scheme up to a rich dark scheme along with a modern twist on the ornament design. Foil a selection of Christmas sentiments onto Eggplant card in Matte Gold Hot Foil. Here I used some sentiments from the Spellbinders Christmas Magic Hot Foil plate set along with an older Spellbinders Christmas sentiment set.

Once you have foiled enough sentiments to cover the ornament, use the outline die from the Stitched Ornament die set to cut out the from the foiled sentiment background. Next, die-cut the topper and decoration elements for the ornament out of gold mirror card stock and adhere on the top.

Splatter white and gold metallic paint over an Eggplant card panel and once dry add this to a white card base. Foam mount the ornament on the top to help this stand out from the background for a tone on tone look.

Finish the card by adding a foiled sentiment on a white strip and add a black bow to the top of the ornament.

Shopping list for Two looks with one die:
Links to supplies at Bumbleberry Papercrafts Shop:
 Neenah Classic Crest Solar White 110lb Cardstock Shop at: BP |
 Neenah Classic Crest Solar White 80lb Cardstock Shop at: BP |
 Glimmer Hot Foil System - Spellbinders Shop at: BP |
 Glimmer Hot Foil Roll - Matte Gold - Spellbinders Shop at: BP |
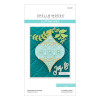 Stitched Ornament dies - Spellbinders Shop at: BP |
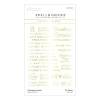 Christmas Magic Glimmer Hot Foil Plate - Spellbinders Shop at: BP |
 Tiled Chevron 3D Embossing Folder - Altenew Shop at: BP |
 Eggplant Hero Hues Cardstock - Hero Arts Shop at: BP |
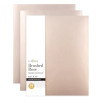 Brushed Rose Metallic Cardstock - Altenew Shop at: BP |
 Ivory Opal Gems - Crafty Meraki Shop at: BP |
If you enjoyed this post and create a card like this, make sure you share it in the Bumbleberry Craft Room on Facebook for us to check it out!
Until next time!
Verity

