
Hello there, it is Verity here from Pretty Little Button for the Bumbleberry Design team. We often by a product with a project in mind, but then struggle to use it for another design. Here I have 5 cards showing you how to stretch your supplies for multiple cards designs. One tip I find that helps is to choose a colour scheme to create with and then change the card base sizes and shapes to create variation. You'll also find these cards in the newly release Die-cutting Essentials magazine, issue 66 released on the 25th of June. So let's get started!
Written and photos Stretching your supplies for multiple cards :
Card 1:
Start off by trimming a piece of Wild Lilac Gina K cardstock down to 4.75” by 6.75”. Next, using a blending tool, start at one end blending bright Fuschia ink to about t 2 thirds of the panel down, fading this out as you move down the panel. Repeat this by using darker purple ink, but only blend down a third of the panel.
Next, tear the card panel horizontally at the light end for a distressed look. Using a paintbrush, add some gold paint splatters to the panel and leave this to dry. Whilst this is drying, die-cut the Concord & 9th Modern Frames die set from white and Lemon Drop Gina K cardstock, ensuring you cut two of the hexagon frames in white.
When the card panel is dry, foam mount this onto a white 5” by 7" card base. Next, adhere the two white hexagon frames into the middle of the panel, rotating the second hexagon for added variation. Create a floral cluster to one side of the frames using the die-cuts out of white and Lemon Drop card stock.
Add a white heat embossed birthday sentiment using the Altenew Birthday Builder stamp set and lastly, add a selection of White Gloss Tonic Nuvo crystal drops.
Card 2:
For this card, trim a piece of Gina K Designs Lovely Lavendar cardstock down to a quarter of an inch smaller than a UK DL (slimline card) white card black. Using the stitched debossing die from the Concord & 9th Stitched Blooms die set, die-cut the design into the card panel twice, flipping the design 180 degrees and leaving a 2-3cm gap in between.
Next, use a blending tool to ink blend a Fuchsia ink around the edges for a soft look. Stamp the flowers and leaves from the co-ordinating Concord & 9th Stitched Blooms stamp set onto white card and use the coordinating dies to cut these out. For the sentiment, use the small stitched rectangle die from the Concord & 9th Stitched Blooms die set and die-cut this out of Edible Eggplant Cardstock from Gina K Designs.
In addition, run this through your die-cutting machine one more time with the ‘Thank You’ dies centred in the middle of the rectangle.
Foam mount the sentiment onto the middle of the panel between the debossed stitching.
For added variation use a variety of dimensional foam pads to adhere the die-cut flowers and leaves up the card panel and around the sentiment. Mount the panel onto a white DL card blank and lastly finish off with Morning dew Tonic Nuvo Crystal drops.
Card 3:
Start off by trimming a selection of card stock into 1/2" strips. Here the colours used were: Edible Eggplant, Wild lilac, Lovely Lavender, lemon drop Gina K designs cardstock and also white card, with the direct to paper method using a dark purple ink to drag over the white card a dark purple. Next, adhere the strips vertically to a white card panel measuring at 4.75” by 6.75”.
Using the frame die from the Concord & 9th Modern Frames die set, die cut this into the striped panel. Next, adhere the striped panel to a 5” by 7” card base, and foam mount the hexagon back into the middle of the panel for raised dimension. In addition, die-cut the frame from white card 3 more times, and adhere one of the white frames back into the striped panel as a die-cut inlay. Now adhere the two further white frames onto the panel, rotated slightly for variation.
Next, stamp the flowers and leaves from the co-ordinating Concord & 9th Stitched Blooms stamp set onto white card and use the coordinating dies to cut these out.
Adhere the flowers and leaves to either side of the frames in a cluster using foam pads for more dimension.
Next, heat emboss the sentiment ‘Miss you’ from the Concord & 9th Stitched Blooms stamp set in white onto black card and trim this down. Lastly, foam mount the sentiment onto the card panel in the centre and add a selection of White gloss Tonic Nuvo crystal drops
Card 4:
Start off by die-cutting the stitched rectangle die from the Concord & 9th Stitched Blooms die set out of Gina K Lovely Lavender cardstock about 10 times. In addition, cut one rectangle out of Gina K Designs Lemon Drop Cardstock. Run this through your machine, with the ‘Love You’ dies centred in the middle to create the sentiment.

Add foam pads to the back of all the rectangle die cuts and using a T-rule find the centre of a 7" by 7” square card base. Next, adhere the yellow die-cut sentiment over the middle of the card, and adhere two further Lovely Lavendar die-cuts either side. Leave a gap between the pieces to give the appearance of a brick wall later on. Keep adhering the remainder of the rectangles to the card, making sure you offset the line below or above to give a ‘brick wall’ look.
Stamp the flowers and leaves from the co-ordinating Concord & 9th Stitched Blooms stamp set onto white card and use the coordinating dies to cut these out.
Adhere the stamped flowers and leaves onto the card as though the flowers are growing out of the bricks. Lastly, finish the card off with Morning dew Tonic Nuvo Crystal drops.
Card 5:
Start off by folding a piece of Gina K Designs Lemon Drop Cardstock in half and using a circle die, position the die with a small section of the circle hanging off the folded edge. Send this through your die-cutting machine and you should now have a circle card base.
Take a smaller circle die to that of the card base and die-cut a circle out of Gina K Lovely Lavender cardstock. Next, use a blending tool to ink blend Fuchsia ink around the edges for a soft look and then foam mount this onto the front of the card.
Using a selection of Lemon Drop Cardstock, Edible Eggplant Cardstock from Gina K designs and white card stock, die-cut the leaf/fronds dies from the Concord & 9th Modern Frames die set. With the white die-cuts, add a little ink blending to the bottom with a blending brush and Fuchsia ink. Next, adhere these around the edge of the foam mounted circle to create a wreath.

Using the Concord & 9th stitched blooms stamp set, heat emboss in white the ‘Thinking of you’ sentiment onto Edible Eggplant Cardstock and use the coordinating die to cut this out. Adhere the sentiment to the front of the card with foam pads for added dimension. Lastly, add a selection of White gloss Tonic Nuvo crystal drops to appear as berries around the wreath.
If you enjoyed today's card, please let us know and we would love to see your cards if this has inspired you.
Shopping list for TITLE:
Links to supplies at Bumbleberry Papercrafts Shop:

Gina K Designs - Connect Glue
Shop at:
BP
|
Neenah Classic Crest Solar White 110lb Cardstock
Shop at:
BP
|

Neenah Classic Crest Solar White 80lb Cardstock
Shop at:
BP
|
Scrapbook Adhesives 3D foam squares 1/4" white
Shop at:
BP
|
"Life Changing" Blender Brushes 2 pack
Shop at:
BP
|
"Life Changing" Blender Brushes 10 Pack
Shop at:
BP
|
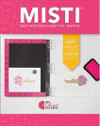
Original MISTI - My Sweet Petunia
Shop at:
BP
|

Eddible Eggplant Cardstock - Gina K Designs
Shop at:
BP
|
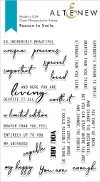
Reason To Smile - Altenew
Shop at:
BP
|

Lemon Drop Heavy Weight cardstock - Gina K Designs
Shop at:
BP
|
Teflon Bone Folder - Lawn Fawn
Shop at:
BP
|

Lovely Lavender Heavyweight Cardstock - Gina K Designs
Shop at:
BP
|
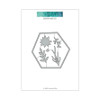
Modern Frames die - Concord & 9th
Shop at:
BP
|
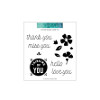
Stitched Blooms stamp set - Concord & 9th
Shop at:
BP
|
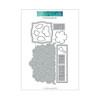
Stitched Blooms die set - Concord & 9th
Shop at:
BP
|

Wild Lilac Heavyweight Cardstock - Gina K Designs
Shop at:
BP
|
If you enjoyed this post and create a card like this, make sure you share it in the Bumbleberry Craft Room on Facebook for us to check it out!
Until next time!
Verity

Pretty Little Button Blog | Instagram | Facebook | Youtube


