FREE Standard UK DELIVERY on all orders over £60
Cart 0

Simply Cards & Papercrafts Magazine Feature (Issue 194)

big thanks die big thanks stamp blending tool Concord & 9th Gina K Gina K Cardstock gina k connect glue Gina K designs Inkadinkado masking paper Lemon Drop cardstock misti Sweet mango cardstock Tranquil Teal Cardstock

 Hello there, it is Verity here from Pretty Little Button for the Bumbleberry Design team. I'm so excited to share these cards with you today as Bumbleberry Papercraft was asked to create some cards using the Concord & 9th Big Thanks stamp and die set for the July issue of Simply Cards & Papercrafts magazine. I was lucky enough to do this feature and I'm up on the blog showing you them today! I created 5 cards with the one set showing how versatile such a bold and simple set is. This colour scheme is also a great colour scheme for either gender so these make great Unisex cards!

Written and photos Simply Cards & Papercrafts Magazine Feature:

Card 1: 

Take a piece of white Neenah Classic Crest Solar White cardstock and low tack tape to mask off a strip of card. Whilst using a blending tool, apply a soft yellow ink above the masked strip of card. Reposition the masking tape to cover the ink blended stripe and apply a second piece of low tack tape to mask off another strip of white card.
Apply another colour of ink using a blending tool. The colours used in this card were a selection of yellow/oranges and a dark teal colour. 
 
Keep repeating steps 3-4, alternating the colours of inks until you have covered the card panel. Using a 4.5” circle die, die-cut a circle from the ink striped background. Next, position the Concord &9th Big Thanks die over the circle background and use low tack tape to keep it in place. Run this through a die cutting machine and make sure you retain all of the pieces.
Apply Scrapbook adhesives 3D foam pads to the negative pieces of the circle die cut background including the pieces between the ‘k-s’ and the inner sections for the ‘a’ and ‘n’. Next, adhered the negative die-cut pieces to a 5” white square card panel. On a piece of black cardstock, stamp the sentiment ‘For all you do’ in embossing ink and cover with white embossing Powder. Next, heat set the powder and trim the sentiment down to then foam mount on top of the inked die-cut, offset to one side. To finish, apply a layer of fun foam to the back of the card and mount on to a 5.25” card base.

Card 2:

For this card, trim a piece of white cardstock in half and place inside a stamping platform such as a MISTI. Position the individual letter stamps from the Concord & 9th Big Thanks stamp set in a horizontal line within the lower third of the platform spelling out ‘Thanks’.Next, ink up the stamps with soft grey ink, and stamp onto the cardstock.

After, move cardstock down in the stamping platform 1.25” and stamp the sentiment in orange ink. Repeat stamping the word, but continue stamping again in the soft grey ink until the cardstock is covered. Remember though to move the cardstock up to stamp at the bottom of the card. 

TIP: Your pattern will look more professional if the pattern designs 'goes off’ the cardstock.

Score a piece of ‘Sweet Mango’ cardstock by Gina K designs in half to create a card base measuring at 4.25” by 11”. Trim your stamped card panel down to have an 0.25” border and adhere to the card base with double-sided adhesive.

Next, stamp the sentiments ‘For all you do’, ‘You rock’ and ‘So much’ in embossing ink onto Tranquil Teal cardstock by Gina K Designs and cover with white embossing Powder. Don't forget to heat set the powder. Trim the sentiments down into thin strips and cut a diagonal on one end for added interest. After, foam mount these onto the card base, aligning the edges for a more professional look.
Lastly, add a few ebony black Nuvo drops as a pop of contrast.

TIP:  Apply these in 3 groups as odd numbers are appealing to the eye and forming a triangle to lead the eye around the card.

Card 3:

Trim a piece of Tranquil Teal cardstock by Gina K Designs down to 8 1/4” x 4 1/8. Whilst using a blending brush, apply a teal ink to on end of the card fading the colour out as you move down the card. Keep applying the ink from the same end to darken the card for an Ombre look. Next, tear the card panel two-thirds of the way down the card to add texture to the card.
For more interest, use a paintbrush to add gold metallic paint splatters and allow this to dry. Whilst this is drying, die-cut the Concord & 9th Big Thanks die 3 times from ‘Lemon drop’ cardstock from Gina K designs and adhere these on top of one another with Connect glue from Gina K Designs. Also, die-cut one more Concord & 9th Big Thanks from black cardstock.

Position the black ‘Thanks’ die-cut in a stamping platform and position the letters stamps from the Concord & 9th Big Thanks stamp set on top of the corresponding letter of the die-cut
.

TIP: Using the negative black card in your stamping platform to position the positive die-cut and to keep it in place whilst your stamp for better alignment

Next, stamp the sentiment in embossing ink and cover with Gold embossing powder, heat setting this. Adhere the embossed black die-cut sentiment onto the yellow layered die cut piece, offsetting to one side to create a faux shadow. Once dried, trim the card panel down to have a 0.25” border and foam mount onto a 8 1/4” x 4 1/8 white card base. Following this, adhere the layered die-cut sentiment onto the card with liquid adhesive. Lastly, stamp the sentiment ‘You rock’ in embossing ink onto white card, covering it in gold powder and heat setting it. 
Finish the card off by foam mounting the secondary sentiment onto the card, offsetting to one side from the main sentiment.

Card 4: 

To start, die-cut the Concord & 9th Big Thanks from Inkadinkadoo masking paper.
Next, peel of the release paper from the die-cut sentiment and adhered to the middle of a Neenah Classic Crest Solar White card panel. Using the mini ink blending tool, blend on a soft yellow ink on one end the card panel, fading it out down the card and over the masked sentiment.
Next, apply a darker shade of yellow/orange to the other end of the card, blending into light yellow to get a seamless blend. Once complete, remove the sentiment mask.
To make the sentiment, stamp in black pigment ink the letter stamps from the Concord & 9th Big Thanks stamp set into the white-masked sentiment area on the card panel.

TIP: You may find this easier in a stamping platform to align the letters up.

After the stamping is complete, trim the card panel down to measure at 5” x3.75” and foam mount this onto a white mat layer that is  0.25” larger. Next, foam mount the panel once more onto a Tranquil Teal cardstock by Gina K Designs measuring at 5.5” x 4.25”.
To finish the sentiment off, stamp the sentiment ‘A big’ in embossing ink onto Tranquil Teal cardstock. Cover with white embossing powder and heat set the powder. You will want to trim the sentiment down and foam mount this onto the card front. Lastly, add a few Caribbean Ocean Nuvo drops by Tonic Studios.

Card 5: 

To start, die-cut the Concord & 9th Big Thanks die from a large piece of scrap cardstock to create a stencil.

TIP: You could cut this out of acetate or a laminated pouch to create a reusable stencil

Temporally adhere the cardstock stencil down over a card panel measuring at 5”x7. In addition, using a temporary tape runner, remember to adhere the pieces between the ‘k-s’ and the inner sections for the ‘a’ and ‘n’. Next, apply an embellishment mouse over the stencil with a spatula. You will want to make sure all areas of the sentiment is covered and scrape an excess mousse off back into the container. Set the card panel to one side to allow the mousse to dry.

Once dried, trim the card down to measure 6.25” x 4.25” and foam mount onto a mat layer of Tranquil teal cardstock by Gina K designs, measuring at 6.75” x 4.75. Next, stamp the heart from the Concord & 9th Big Thanks stamp set in a selectio of yellow/orange inks in three areas around the sentiment. It is a good idea to overlap the hearts for added interest.

Stamp the sentiment ‘Love your face’ in embossing ink onto ‘Sweet Mango’ cardstock by  Gina K designs, covering this in white embossing powder and heat set the powder.

Next, trim the sentiment down and foam mount onto the card front, offset to one side. For more interest, foam mount the card panel onto an A7 white card base.
Lastly, add colour corresponding sequins to the card with liquid glue, and group these around the stamped hearts.
If you enjoyed today's card, please let us know and we would love to see your cards if this has inspired you.
 

Shopping list for Simply Cards & Papercrafts Magazine Feature:


Gina K Designs - Connect Glue
Shop at:
BP
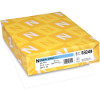
Neenah Classic Crest Solar White 110lb Cardstock
Shop at:
BP
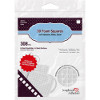
Scrapbook Adhesives 3D foam squares 1/4
Scrapbook Adhesives 3D foam squares 1/4" white
Shop at:
BP
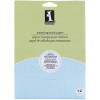
Inkadinkdoo Stamping Mask Paper
Inkadinkado Stamping Mask Paper
Shop at:
BP
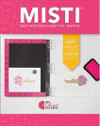
Original MISTI - My Sweet Petunia
Shop at:
BP
Tranquil Teal - Gina K designs
Shop at:
BP
Lemon Drop Heavy Weight cardstock - Gina K Designs
Shop at:
BP
Big Thanks Die - Concord & 9th
Shop at:
BP
Big Thanks Stamp - Concord & 9th
Shop at:
BP
Sweet Mango Cardstock - Gina K
Shop at:
BP
Mini Ink Blending Tool - Ranger Tim Holtz
Shop at:
BP
Mini Ink Blending foam replacements - Ranger Tim Holtz
Shop at:
BP

If you enjoyed this post and create a card like this, make sure you share it in the Bumbleberry Craft Room on Facebook for us to check it out!


Until next time!

Verity


Pretty Little Button Blog | Instagram | Faceb


Older Post Newer Post


Leave a comment