
Hello there, it is Verity here from Pretty Little Button for the Bumbleberry Design team. I have 3 CAS cards for you that are so easy to make and you could make many different designs with this simple technique. Solid creature stamps like this set from PinkFresh Studios are perfect for silhouette stamping and heat embossing, useful for making quick cards in a hurry that look effortless.
Written and photos - Silhouette Stamping and Embossing:
To start off, die-cut a circle out of masking paper. Now make sure there is plenty of space around the circle to protect your card when you use it as we will be ink blending. The masking paper from Inkadinkadoo can be used several times, so you can use one masks for all three cards!
For the first card, we are going to make a very dramatic summer nights sky for the background. Using a selection of blue, purple peach and yellow ink blend from the lightest colour at the bottom up to the darkest colour towards the top. To get a good blend, make sure you go back between the colours.
Once this is complete, remove the mask for a lovely clean crisp look. Next, using black onyx ink, stamp the fox from the set offset to one side of the circle. In addition, stamp a selection of the floral inside the circle. If the stems don't quite join up to the edge, use a black fine liner to extend the lines.
Make sure the panel is dry before stamping a few of the butterflies in embossing ink and cover with gold powder before heat setting. Stamp a sentiment from the set in black ink and foam mount the panel onto a white card base. Lastly, adhere a few sequins to finish the card off.
For this second card, use a selection of soft and bright blues to create a fresh blue sky.
Stamp the elephant, a balloon and one of the start clusters in black ink, trailing the stars across the star. Make sure this is dry before stamping a few more stars in embossing ink to heat set in gold powder. Again, if you miss aligning the balloon up with the elephant trunk extend the line with a black fine liner.
Stamp the sentiment in black in underneath the elephant and again embellish with sequins, adhering with Gina K Connect glue. Foam mount this onto a white card base, leaving a 1/8 inch border.
For this card, create a dark moody night sky to allow the embossing to pop. Ink blend a selection of blues across the circle. Towards the top of the circle, ink blend black into the blue to darken the colour and create a more moody look.
Next, stamp the owl in embossing ink along with a selection of stars and heat emboss this in gold. Stamp the sentiment below the circle offset to one side. To draw the eye through the card, stamp clusters of the stars around the sentiment in the same direction of the stars in the circle.
Again, embellish with sequins and adhere these down with Connect glue. Lastly, foam mount the panel onto a white card base.
If you enjoyed today's card, please let us know and we would love to see your cards if this has inspired you.
Shopping list for Silhouette Stamping and Embossing:
Links to supplies at Bumbleberry Papercrafts Shop:

Gina K Designs - Connect Glue
Shop at:
BP
|
Neenah Classic Crest Solar White 110lb Cardstock
Shop at:
BP
|

Neenah Classic Crest Solar White 80lb Cardstock
Shop at:
BP
|
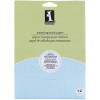
Inkadinkdoo Stamping Mask Paper
Shop at:
BP
|

"Life Changing" Blender Brushes 2 pack
Shop at:
BP
|
"Life Changing" Blender Brushes 10 Pack
Shop at:
BP
|
Original MISTI - My Sweet Petunia
Shop at:
BP
|
Teflon Bone Folder - Lawn Fawn
Shop at:
BP
|

Playful Animal Friends 1 - Pink Fresh Studios
Shop at:
BP
|
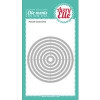
Pierced Circle - Avery Elle-mentals
Shop at:
BP
|
If you enjoyed this post and create a card like this, make sure you share it in the Bumbleberry Craft Room on Facebook for us to check it out!
Until next time!
Verity

Pretty Little Button Blog | Instagram | Facebook | Youtube


