Hello there, it is Verity here from Pretty Little Button for the Bumbleberry Design team. I love to ink blend, but I love it more when it's over heat embossing. Emboss resist is such a fun technique to use with your stamping and if you combine it with metallic embossing powders and dark colours you can get rich & luxurious embossing in no time! What's more, you can easily adapt this to any stamp set you wish, or occasion. And for added variation, why not create an ombre effect with your ink blending.
Written and photos Rich & Luxurious embossing:
To start off, trim a piece of Gina K Tranquil Teal cardstock down to 5.5" x 4.25". The trick for ink blending for rich colour is to use coloured cardstock. This will ensure vibrant colours without having to use all your ink up! Next, treat the card with an antistatic pouch ready for heat embossing.
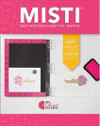
Place the card panel inside your MISTI and place the cherry blossom branch from the Altenew Dotted Blooms stamp set onto the panel. Now, ink the stamp up and stamp onto your card panel. If you are using a slow drying ink to stamp, you can move the stamp and restamp in another position before covering with Gold embossing powder.
Next, heat set the embossing powder with a heat gun - to reduce warping to the card, try to stamp a large amount of the background before heat setting it to reduce the number of times you bring the heat gun to the card. Keep repeating this until the background is full. Now, you can also stamp the two smaller inners of the flowers in some of the spaces on the background to fill any larger spaces up.
Next, using a blending tool and foam pad, start blending a dark teal dye ink onto the card around all four sides. Bring this colour in towards the centre, but don't completely fill the panel - leave the centre the colour of the cardstock.
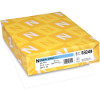
Next, repeat this process but use a navy dye ink, only blending this colour on the edges of the cardstock. Now, using a clean dry cloth wipe over the heat embossing to remove any excess ink. Once complete, adhere this onto a white card base made out of Neenah Classic Crest Solar White 110lb cardstock.
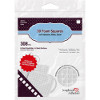
Stamp a sentiment from the Dotted Bloom stamp set onto a piece of Gina K Sea Glass cardstock and cover with matching gold embossing powder. Next, ink blends the dark teal ink onto the bottom of the card and soften out. Following this, trim the sentiment down into a strip and foam mount onto the front of the card.
Lastly, adhere selection of gold sequins to the card to finish the car off.
If you enjoyed today's card, please let us know and we would love to see your cards if this has inspired you.
Shopping list for TITLE:
Links to supplies at Bumbleberry Papercrafts Shop:

Gina K Designs - Sea Glass Cardstock
Shop at:
BP
|

Gina K Designs - Connect Glue
Shop at:
BP
|

Neenah Classic Crest Solar White 110lb Cardstock
Shop at:
BP
|

Scrapbook Adhesives 3D foam squares 1/4" white
Shop at:
BP
|

Original MISTI - My Sweet Petunia
Shop at:
BP
|

Tranquil Teal - Gina K designs
Shop at:
BP
|

Mini Ink Blending Tool - Ranger Tim Holtz
Shop at:
BP
|

Mini Ink Blending foam replacements - Ranger Tim Holtz
Shop at:
BP
|

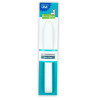
Teflon Bone Folder - Lawn Fawn
Shop at:
BP
|

Dotted Blooms Stamp - Altenew
Shop at:
BP
|
If you enjoyed this post and create a card like this, make sure you share it in the Bumbleberry Craft Room on Facebook for us to check it out!
Until next time!
Verity

Pretty Little Button Blog | Instagram | Facebook | Youtube


