Hello there, it is Verity here from Pretty Little Button for the Bumbleberry Design team. Beautiful cards don't have to take ages to make, and when you pair die-cutting with rainbow ink blending you get a match made in heaven. This quick and easy card with die-cutting uses a beautiful rose wreath from Altenew, and it is so soft and delicate with so much detail. I used it to create a beautiful CAS card with a simple bold sentiment to make a striking yet elegant card. The trick to the soft blending - the new Altenew ink blending tool.
Written and photos Quick and easy card with simple die-cutting :
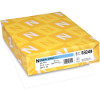
To start off, trim down a piece of white Neenah Classic Crest Solar White 80lb card stock to 5.5" x 4.25. Next, select a rainbow of colours from any ink pads you have within your stash. With an Altenew Ink Blending tool, start to apply one colour ink from the outside of the panel to middle.
Next, repeat this using another colour of ink. You don't need one tool for every colour as you can clean your brush in between. However, having more than one tool will speed up the process. Make sure you overlap the colours to blend them.
Keep repeating the process blending in a circle around the card, going through the rainbow of colours until the card is complete.
Once the ink blended panel is complete, use the Altenew Rose Wreath die to die cut out of the rainbow panel. In addition, die-cut the rose wreath out of Gina K Soft Stone cardstock another 2 times, and layer up all 3 die-cuts with liquid adhesive. Adhere this to a white card base with liquid adhesive.
For the sentiment, die-cut the Altenew Waterbrush Hello from black cardstock 3 times and layer up for dimension. Using liquid adhesive, add the die-cut sentiment to front.
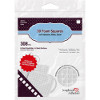
In addition, stamp in black in a sentiment from the Altenew Sentiment Strips stamp set, trimming this down to foam mount onto the front of the card. Lastly, add a few sequins to embellish the wreath and the card is finished.
If you enjoyed today's card, please let us know and we would love to see your cards if this has inspired you.
Shopping list for Quick and easy card with simple die-cutting :
Links to supplies at Bumbleberry Papercrafts Shop:

Gina K Designs - Connect Glue
Shop at:
BP
|

Neenah Classic Crest Solar White 110lb Cardstock
Shop at:
BP
|

Neenah Classic Crest Solar White 80lb Cardstock
Shop at:
BP
|

Scrapbook Adhesives 3D foam squares 1/4" white
Shop at:
BP
|

Soft Stone Heavy Weight Cardstock - Gina K Designs
Shop at:
BP
|

Original MISTI - My Sweet Petunia
Shop at:
BP
|

Sentiment Strips 2 - Altenew
Shop at:
BP
|

Ink blending tool large - Altenew
Shop at:
BP
|

Rose Wreath Die - Altenew
Shop at:
BP
|

Waterbrush Hello Die - Altenew
Shop at:
BP
|
If you enjoyed this post and create a card like this, make sure you share it in the Bumbleberry Craft Room on Facebook for us to check it out!
Until next time!
Verity

Pretty Little Button Blog | Instagram | Facebook | Youtube


