
Hello there, it is Verity here from Pretty Little Button for the Bumbleberry Design team. I'm really loving using coloured cardstock panels, particularily the darker the better. But I also love to colour as well, so today I'm sharing my tips on pencil colouring on dark card. And as soon as I saw this beautiful floral stamp from PinkFresh Studios, I thought it would be perfect for just this technique! The floral arrangement allows the card to pop through against those softer colours really making the design stand out.
Written and photos Pencil colouring on dark cardstock:
To start off, trim a piece of Nautical Hero Hues cardstock from Hero Arts to 5.25" by 4". Next, place the panel in you MISTI stamping tool and position the PinkFresh Studio Full Bloom stamp in the middle of the panel.
Stamp the full bloom in embossing ink and cover with white heat embossing before heat setting. Next, it is time to colour in the design. To make your colouring pop, you need to put a light layer of the white pencil down first - this should be light as you do not want to wear the tooth of the card down that you cannot add colour over the top.
The white colour at as a base for you now to start colouring in the design with the colours of your choice. Remember to add a couple of shades in to create depth and dimension. I like to go back in with my white pencil to help smooth and blend the shading .
After the colouring is complete, you may wish to go in with a white gel pen to clean up the heat embossing anywhere where you may have gotten a little pencil colour on it. The Creative Detailer from Couture Creations is a great eraser at removing any pencil dust on the cardstock, especially in smaller areas.
To add a little more atmosphere, ink blend dark grey ink around the edge of the card using a blending tool. This will add a little more drama. You can now add this to a white card base, and foam mount this for added dimension.
Choose a sentiment from the stamp set to stamp in dark blue ink onto white cardstock and trim down to foam mount onto the front of the panel. Lastly, add a selection of Nuvo drops around to the floral image to finish the card off.
If you enjoyed today's card, please let us know and we would love to see your cards if this has inspired you.
Shopping list for Pencil colouring on dark cardstock:
Links to supplies at Bumbleberry Papercrafts Shop:

Gina K Designs - Connect Glue
Shop at:
BP
|
Neenah Classic Crest Solar White 110lb Cardstock
Shop at:
BP
|

Neenah Classic Crest Solar White 80lb Cardstock
Shop at:
BP
|
Scrapbook Adhesives 3D foam squares 1/4" white
Shop at:
BP
|
Original MISTI - My Sweet Petunia
Shop at:
BP
|

Mini Ink Blending Tool - Ranger Tim Holtz
Shop at:
BP
|

Mini Ink Blending foam replacements - Ranger Tim Holtz
Shop at:
BP
|
Teflon Bone Folder - Lawn Fawn
Shop at:
BP
|

Hickory Smoke Distress Oxide - Ranger Ink
Shop at:
BP
|
Hero Hues Cardstock Sampler pack - Hero Arts
Shop at:
BP
|
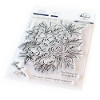
Full Bloom - PinkFresh Studio
Shop at:
BP
|

Nautical Hero Hues Cardstock - Hero Arts
Shop at:
BP
|
|
If you enjoyed this post and create a card like this, make sure you share it in the Bumbleberry Craft Room on Facebook for us to check it out!
Until next time!
Verity

Pretty Little Button Blog | Instagram | Facebook | Youtube


