
Hello there, it is Verity here from Pretty Little Button for the Bumbleberry Design team. If you like to use pencils to colour images in, but are tired of colouring onto white cardstock, then why not try coloured instead? It is very easy to do when you know-how and can add so much atmosphere to your card with such a simple change. For today's card, I used the Slate cardstock from Gina K Designs to create an elegant yet modest sympathy 'I'm here with you' card. Pair this with soft subtle stencil background and you've got a match made in heaven!
Written and photos No-line Pencil colouring on dark colour cardstock:
To start, trim a piece of Gina K designs Slate cardstock down and place inside your MISTI. Using embossing ink, stamp the large floral bouquet from the Altenew Blooming Bouquet stamp set. I suggest stamping it twice so it is easier to see the design as you colour it in.


Shopping list for No-line Pencil colouring on dark colour cardstock:
Links to supplies at Bumbleberry Papercrafts Shop:
 Gina K Designs - Connect Glue Shop at: BP |
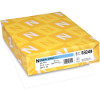 Neenah Classic Crest Solar White 110lb Cardstock Shop at: BP |
 Neenah Classic Crest Solar White 80lb Cardstock Shop at: BP |
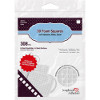 Scrapbook Adhesives 3D foam squares 1/4" white Shop at: BP |
 "Life Changing" Blender Brushes 2 pack Shop at: BP |
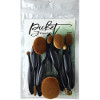 "Life Changing" Blender Brushes 10 Pack Shop at: BP |
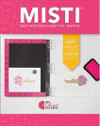 Original MISTI - My Sweet Petunia Shop at: BP |
 Slate - Gina K designs Shop at: BP |
 Teflon Bone Folder - Lawn Fawn Shop at: BP |
 Blooming Bouquet - Altenew Shop at: BP |
 Broken Chevron Stencil - Altenew Shop at: BP |
 Sentiment Strips - Altenew Shop at: BP |
 Hickory Smoke Distress Oxide - Ranger Ink Shop at: BP |
If you enjoyed this post and create a card like this, make sure you share it in the Bumbleberry Craft Room on Facebook for us to check it out!
Until next time!
Verity


Hi Dianne, I stamped it in embossing ink onto the cardstock. This will stamp the image with a tone on tone colour to the cardstock and I can colour over the ink/lines. So once coloured in, it looks completely free drawn with no stamped lines visible
Thank you for giving this tutorial however I don’t understand if this is line free colouring what do you stamp the image with to not get lines. Hope you can answer this.
Thank you
Regards Diane