Hello there, it is Verity here from Pretty Little Button for the Bumbleberry Design team. I don't usually make kids Xmas Cards, as I'm never sure what to create. However, this year I want to try and make some Xmas cards for my niece and nephew, so I started to brainstorm what I could make. I decided the easiest way to make a card, was to make them in a theme they would like. My Niece loves unicorn and my nephew has started getting into baking, so I search the Bumbleberrys website on both themes and wham, these cards happen! So I'm sharing how I used these non-holiday stamps to create Kids Xmas cards!
Written and photos Kids Xmas cards with non-holiday stamps:
Once magical way to turn a unicorn into a Christmas card is to use a Christmas colour scheme - red, green and gold! Start off by stamping the inner flowers on white card with embossing ink and heat set in WOW! Metallic Rich Gold Embossing powder. Next, use the coordinating dies to die cut the flowers out.
Using dark green and dark red inks, apply ink to the die-cuts with the direct to paper method. In addition, colour a couple of strips of paper in two additional green ink and die-cut the leaves from this.
Heat emboss the unicorn in gold and die-cut this out as well as die-cutting the ears several times to layer up. Next, smoosh embossing ink over the ears and cover with WOW! Clear Hologram embossing glitter and heat set. Layer up the pieces onto a white card panel with foam adhesive to form the unicorn.
For more sparkle, add some clear holographic embossing glitter to the edge of the card panel and add this to a Cherry Red cardbase. Lastly, stamp a sentiment and the eyes to the front of the card in Versafine Onyx black ink.
For this card, I use the Lawn Fawn Magic Picture Changer oven add on die to create a festive oven for baking! Die-cut the pieces out of red and white cardstock. Make sure you die-cut the oven frame door out of white card several times. Sandwich a piece of acetate between to frames and trim this down.
Next, add this onto the over adding a fold at the bottom first to allow the oven door to open. Add a backing inside the over the door and add a few trays inside with cookies on them - these were created by die-cutting the nobs, cutting them in half and colouring them.
To add to the Christmas colour scheme, colour the potholder and pot in with green Copic markers. Lastly, adhere all the small pieces onto the oven and add to a white card base. Finish off by adding a heat embossed sentiment to the front of the over door.
If you enjoyed today's card, please let us know and we would love to see your cards if this has inspired you.
Shopping list for Kids Xmas cards with non-holiday stamps:
Links to supplies at Bumbleberry Papercrafts Shop:

Gina K Designs - Connect Glue
Shop at:
BP
|

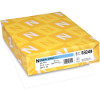
Neenah Classic Crest Solar White 80lb Cardstock
Shop at:
BP
|

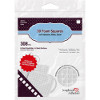
Scrapbook Adhesives 3D foam squares 1/4" white
Shop at:
BP
|

Happy Holidays - Altenew
Shop at:
BP
|

Cherry Red Cardstock - Gina K Designs
Shop at:
BP
|

Magical Unicorn - PinkFresh Studio
Shop at:
BP
|

Magical Unicorn die - PinkFresh Studio
Shop at:
BP
|

Magic picture changer oven add die - Lawn Fawn
Shop at:
BP
|
If you enjoyed this post and create a card like this, make sure you share it in the Bumbleberry Craft Room on Facebook for us to check it out!
Until next time!
Verity

Pretty Little Button Blog | Instagram | Facebook | Youtube


