
Hello there, it is Verity here from Pretty Little Button for the Bumbleberry Design team. Today I have a couple of cards using ink cubes: adding colour without stamping. This is a great way to get more out of your supplies and you can easily use your ink cubes with your die cuts. I have two cards using a gorgeous die from Altenew: Floral heart frame die and how to either use your ink cubes to create colour with your die or to create a colourful background for the die to overlay.
Ink cubes: Adding colour without stamping photos and written step-by-step:
Colouring your die cuts:
Die cut the floral heart frame die from watercolour card stock. Using a glass mat or any other media mat you have, smoosh down a couple of ink pads onto your surface. I use Ruby Red and Coral Berry from the Red Cosmos mini ink cube collection, and Saphire and Persian blue from the Glacier Caves mini ink cub set.
Next, spritz these smooshed ink colours with water generously so the colours start to move. Dip your die cut down into the colours, pick up the colours onto your die cut and allowing the colours to blend. You can heat set in between if you want your colours to layer and not blend with one another.
For darker more vibrant colours, heat set and repeat the step once more to intensify the colours. Before you clean up your surface, use a paintbrush to pick up the colours and splatter the ink over a white card panel made out of Neehan Solar White Classic Crest 80lb cardstock and set to one side to dry.
Once you die cut is dry, adhere these to another die cut out of white card to layer the die and create dimension. Adhere this down onto your dried card panel and secure with Gina K Connect glue. Add a heat embossed the sentiment from the Birthday Builder stamp set and foam mount on to the card from.
Adhere the finished card panel onto a card base made out of Soft Slate Gina K cardstock with fun foam and lastly, add a few colour corresponding sequins to tie in with the coloured die cut.
Creating an ink block background:
Apply ink to a clear acrylic block to a size of your choice - the best way to do this is to smoosh your ink pad down onto the block. Allow the colours to overlap slightly. Using your water bottle, spritz with water so the ink colours start to move and blend.
Taking a piece of watercolour card, place this over the block, pressing it down into the ink. Apply a little pressure so the colour absorbs into the paper. Alternatively, you could flip to the block over onto your watercolour paper. However, if you have loaded the block with a lot of water, this could run off the block as you tip it over. Set the panel to dry.
Die-cut 3 of the floral heart frame dies from white card, and layer these up with Gina K Connect glue. Heat emboss another birthday sentiment from the Birthday Building stamp set using platinum embossing powder. Once heat set, fussy cut out the sentiment.
Once your ink block background is dry, trim this down leaving a white border. Foam mount this onto a card base made out of Soft Slate Gina K cardstock using fun foam.
Adhere the frame die onto the card panel with Gina K connect glue and use Scrapbook adhesive foam pads to add the sentiment. Lastly, adhere a few colour corresponding sequins to the card to finish the card off.
If you enjoyed today's card, please let us know and we would love to see your cards if this has inspired you.
Shopping list for Ink cubes: Adding colour without stamping:
Links to supplies at Bumbleberry Papercrafts Shop:
|

Gina K Designs - Connect Glue
Shop at:
BP
|
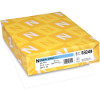
Neenah Classic Crest Solar White 110lb Cardstock
Shop at:
BP
|
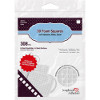
Scrapbook Adhesives 3D foam squares 1/4" white
Shop at:
BP
|
Soft Stone Heavy Weight Cardstock - Gina K Designs
Shop at:
BP
|
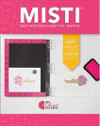
Original MISTI - My Sweet Petunia
Shop at:
BP
|
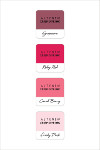
Red Cosmos Mini Ink Cubes - Altenew
Shop at:
BP
|
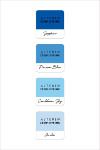
Glacier Caves Mini Ink Cubes - Altenew
Shop at:
BP
|
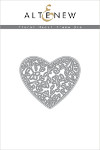
Floral Heart Frame Die - Altenew
Shop at:
BP
|
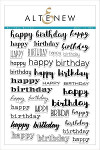
Birthday Builder - Altenew
Shop at:
BP
|
If you enjoyed this post and create a card like this, make sure you share it in the Bumbleberry Craft Room on Facebook for us to check it out!
Until next time!
Verity

Pretty Little Button Blog | Instagram | Facebook | Youtube


