
Hello there, it is Verity here from Pretty Little Button for the Bumbleberry Design team. Have you used layering stamps before but want a different way to use them? Well, why not create a faux watercolour look to your stamping? Faux watercolouring with stamp layering can create some fun and unique looks; they may even look like you hand painted them, but without the fuss! If you've not even used a stamp layering set before, I've also got a basic card with normal stamp layering as well to start you off with.
Faux watercolouring with layering stamps photos and written step-by-step:
Normal stamping with layering stamps
For the basic stamping and ink, you need to start off with the lightest layer and colour first. The lightest layer will always be the stamp layer with the most amount of 'full' stamp area to it. Altenew label all the layers, and usually have an outline on the stamp package around the stamps that layer together. So for the first layer, you need to find layer one within that grouping.
I stamped the first layer in light pink ink and then aligned the second layer (label 2 within the grouping)stamping it in a brighter pink ink. The stamp packing comes with a guide to show you what parts of the stamp on each layer you can use to align the layers.

For the last layer - the outline layer I used a darker pink ink. I also stamped the 2 layers for the leaves in light and dark green ink.
Repeat this process for a second floral cluster, I changed the colour of my second layer slightly duskier pink ink. These floral images were fussy cut-out.

For the background panel, trim down a piece of Soft Slate cardstock by Gina K Designs and score the background at every 1/2 for additional interest. For even more interest, add some white gold paint splatter using the Gansai Tambi Starry Colours paint set
Foam mounted this onto a white card base and foam mounted the floral clusters with Scrapbook Adhesives foam pads. Add a white heat embossed the sentiment from the Altenew Cake Lovers stamp set and add a few sequins for finishing touches.

Faux watercolouring with layering stamps - Water spritz stamping onto dry paper (technique 1)

Repeat the process with the next layer, once again spritzing with water before stamping. When you stamp down, the two colours from the layers will start to blend with one another and give a faux watercolour look. Heat set this before you stamp the last layer.
For the last layer you can spritz with water, or for a cleaner outline, omit the water and stamp normally.

Faux watercolouring with layering stamps - Water spritz stamping onto wet paper (technique 2)
For a more artistic look, you can take your faux watercolour stamping one step further. Once you have placed your watercolour cardstock into your stamping platform, mist your paper so there is a slight sheen to it. Ink up your layer and spritz the stamp before you stamp it. When you stamp the layer, the wet ink will come into contact with the wet watercolour paper and will move more. The ink will spread out from where their original stamp layer is, but will still resemble the shape of the layer.


Shopping list:
Links to supplies at Bumbleberry Papercrafts Shop:
 Gina K Designs - Connect Glue Shop at: BP |
 Neenah Classic Crest Solar White 110lb Cardstock Shop at: BP |
 Scrapbook Adhesives 3D foam squares 1/4" white Shop at: BP |
 Soft Stone Heavy Weight Cardstock - Gina K Designs Shop at: BP |
 Original MISTI - My Sweet Petunia Shop at: BP |
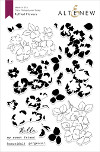 Ruffled Flowers - Altenew Shop at: BP |
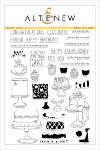 Cake Love - Altenew Shop at: BP |
If you enjoyed this post and create a card like this, make sure you share it in the Bumbleberry Craft Room on Facebook for us to check it out!
Until next time!
Verity

